
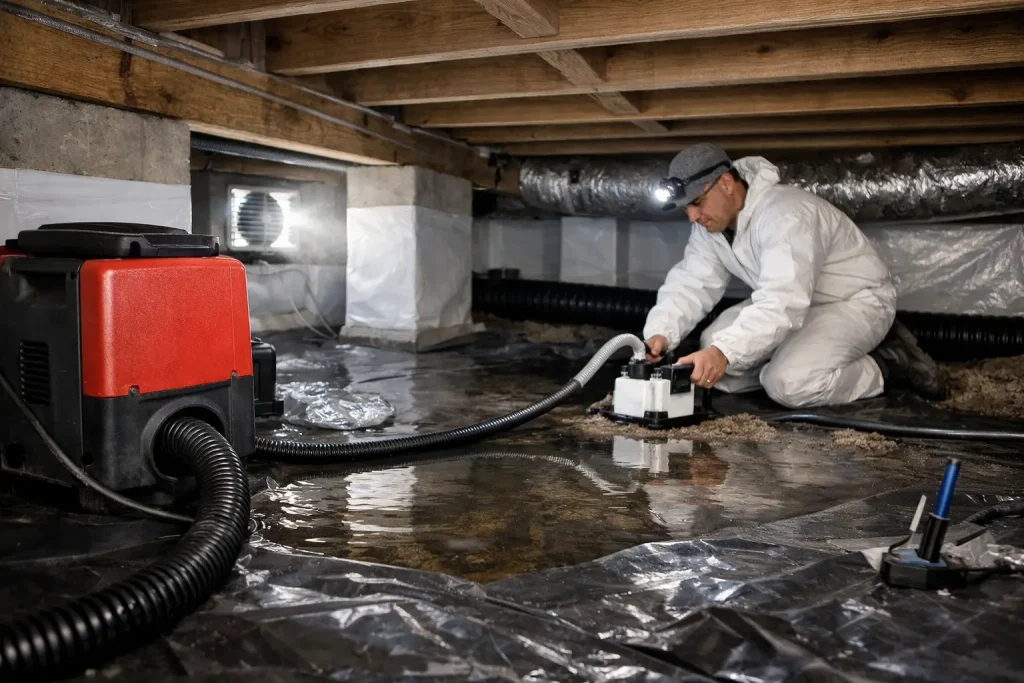
A crawl space does not need standing water to create a serious problem. Damp soil, wet insulation, musty odors, and condensation on pipes can all signal moisture that is affecting the structure and air inside your home. This guide to crawl space moisture control explains what causes those conditions, how to evaluate them, and which repairs provide meaningful long-term protection.
For New Jersey homeowners, crawl space moisture is rarely just a cosmetic concern. Our seasonal rain, humid summers, snowmelt, and high water tables can keep the soil around a foundation wet for extended periods. If that water has an easy path into the crawl space, the result may be mold growth, wood deterioration, pests, higher energy costs, and unhealthy air moving upward into the living areas.
Why Crawl Space Moisture Needs Prompt Attention
A crawl space is part of the home, even if it is out of sight. Moisture below the first floor can evaporate into the structure and travel through gaps around plumbing, ductwork, and framing. This is often called the stack effect: as air rises through the home, it can draw air from the crawl space with it.
That means a damp crawl space may contribute to musty smells in bedrooms, worsened allergy symptoms, and humidity problems throughout the house. It can also make floors feel cold in winter and force heating and cooling equipment to work harder.
The structural risks deserve equal attention. Floor joists, sill plates, beams, and subflooring are wood-based materials. Prolonged moisture creates the conditions for mold and wood-decaying fungi. A small amount of surface discoloration is not always a structural emergency, but soft wood, sagging floors, or visible rot requires a professional assessment before the damage spreads.
Common Sources of Crawl Space Water
Effective crawl space moisture control starts by finding the source. Installing a vapor barrier without correcting active water entry can conceal the problem rather than solve it.
Exterior Drainage Problems
Roof runoff is one of the most common causes. Gutters that overflow, downspouts that discharge beside the foundation, or extensions that do not carry water far enough away can saturate the soil around the crawl space. Water then presses against foundation walls and may seep through cracks, joints, or porous masonry.
Improper grading can produce the same result. The ground should generally slope away from the house so rainwater moves outward rather than collecting against the foundation. Settling soil, hardscape changes, and landscaping projects can gradually change that slope.
Groundwater and Surface Water
Some homes sit in areas where the water table rises after extended rain. Others receive runoff from neighboring properties or a sloped yard. In these cases, the crawl space may take on water even when gutters and grading are reasonably maintained.
A perimeter drainage system, such as an interior French drain installed at the crawl space footing, can collect incoming groundwater and direct it to a sump pump. This approach is often more dependable than repeatedly trying to seal water out from the exterior when surrounding soil remains saturated.
Humidity and Condensation
Not every damp crawl space has visible leakage. In summer, warm humid outdoor air can enter through open vents and meet cooler surfaces inside the crawl space. Water then condenses on ducts, pipes, insulation, and wood framing.
This is why ventilation is not a universal cure. In a humid New Jersey climate, venting can sometimes bring more moisture into the crawl space. The right approach depends on whether the primary issue is outside humidity, groundwater, plumbing leakage, or a combination of conditions.
Plumbing Leaks
Slow leaks from supply lines, drainpipes, or appliances can keep one part of a crawl space wet for months. Look for dripping pipes, staining under bathrooms and kitchens, or a concentrated wet area that does not correspond with rainfall. Plumbing repairs should be completed before moisture-control work is finalized.
Signs Your Crawl Space Needs More Than a Quick Fix
A musty odor, damp insulation, and small puddles are clear warnings, but some signs are easier to miss. Cupboard doors that stick, uneven or bouncy floors, elevated indoor humidity, peeling paint, and recurring mold in rooms above the crawl space can all point to excess moisture below.
During an inspection, a qualified contractor should look beyond what is visible from the access door. That includes checking foundation walls, floor framing, insulation, drainage conditions, sump equipment if present, and the condition of any existing vapor barrier. The goal is not to sell the largest project. It is to identify where water is entering and recommend a system sized to the actual problem.
A Practical Guide to Crawl Space Moisture Control
Most durable solutions combine water management, moisture separation, and ongoing mechanical protection. The exact system varies by home, but the order of work matters.
1. Control Water Outside the Foundation
Start with the basics: keep gutters clean, repair damaged sections, and make sure downspouts release water well away from the home. Correct negative grading where practical, and avoid building mulch or soil against siding and foundation vents.
These measures can reduce the water load around the foundation, but they are not always enough on their own. A home with a naturally high water table or recurring seepage may still need an interior drainage system.
2. Remove Water That Reaches the Crawl Space
If water enters at the footing or through foundation walls, a properly designed drainage system can intercept it. Water flows into the drain, is directed to a sump basin, and is discharged safely away from the house by a sump pump.
The pump is a critical component, not an afterthought. It should be correctly sized, installed in an accessible basin, and tested regularly. Homes that experience frequent water or power outages may benefit from a battery backup system. A backup does not replace regular maintenance, but it provides valuable protection when the primary pump cannot run.
3. Install a Sealed Vapor Barrier
A thin sheet of plastic loosely laid over dirt may reduce some moisture, but it is not the same as crawl space encapsulation. A properly installed vapor barrier covers the ground, extends up foundation walls where appropriate, and is sealed at seams and penetrations.
Its purpose is to limit moisture vapor rising from the soil. In an enclosed or conditioned crawl space, this barrier becomes a central part of the system. It also creates a cleaner surface for future inspections and service work.
Material quality and installation details matter. Tears, open seams, unsealed columns, and gaps around pipes allow moisture to bypass the barrier. This is one reason homeowners should be cautious about treating crawl space protection as a simple weekend project when there is active water, mold, or framing damage.
4. Address Humidity With the Right Equipment
After water entry and ground vapor are controlled, a crawl space dehumidifier may be appropriate to maintain a healthy humidity level. The unit needs to be sized for the area and conditions, with a reliable drainage path so it does not create another maintenance issue.
Encapsulation and dehumidification work well together, but a dehumidifier should not be used to compensate for standing water or major foundation seepage. It treats moisture in the air, not the source of bulk water.
5. Repair Damage and Remove Mold Safely
Wet or fallen insulation may need replacement after the moisture source is corrected. Mold remediation may also be necessary when growth is widespread or has affected wood framing and other materials. The area must be properly cleaned and the moisture conditions corrected, or the mold is likely to return.
If floor framing has deteriorated, repairs should be planned alongside water control. Reinforcing or replacing damaged wood before stopping the moisture is a short-lived repair. The better approach protects both the structure and the investment in the repair.
What Homeowners Can Maintain
A professionally installed system still benefits from regular attention. Check the crawl space after heavy rain, inspect the sump pump periodically, and keep discharge lines clear. Make sure gutters are not overflowing and that downspout extensions have not shifted or become blocked.
You should also pay attention to changes inside the home. A returning musty odor, new floor movement, or a sudden increase in humidity can be an early signal that a pump, drain, plumbing line, or exterior drainage feature needs service.
Choosing a Crawl Space Contractor
Crawl space recommendations should be based on an inspection, not fear. Be wary of one-size-fits-all proposals that skip the drainage discussion or promise that a vapor barrier alone will solve every issue. Ask what is causing the moisture, how the proposed system handles that cause, who will perform the work, and what warranty applies.
At A-1 Basement Solutions, the focus is on clear explanations and practical repairs performed by in-house crews. Homeowners deserve to understand the condition of their crawl space and the purpose of every recommended component, without pressure or unnecessary work.
A dry, protected crawl space supports the rest of the house from the ground up. If you notice dampness or odors, addressing it while the signs are still manageable can protect your home, your indoor air, and your peace of mind for years to come.