
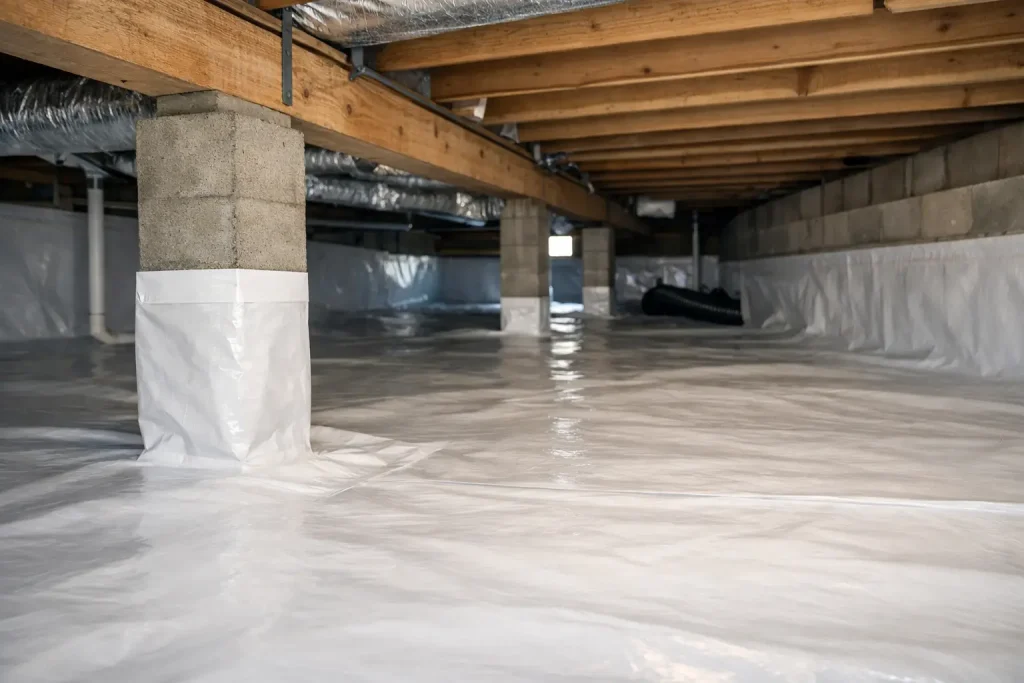
A crawl space can look dry from the access door and still be feeding moisture into the home every day. Bare soil releases water vapor continuously, especially through New Jersey’s humid summers and wet spring seasons. This crawl space vapor barrier guide explains what a ground cover does, where it falls short, and how to make a lasting decision without paying for work your home does not need.
What a Crawl Space Vapor Barrier Actually Does
A vapor barrier is a heavy plastic membrane installed over the exposed soil in a crawl space. Its primary job is to slow moisture vapor rising from the earth into the air beneath your home. That matters because crawl space air can move upward through gaps around plumbing, wiring, and framing, affecting the rooms above.
Reducing ground moisture can help limit musty odors, condensation on ducts and pipes, mold-friendly conditions, and damp insulation. It may also make the crawl space less appealing to pests that prefer wet, dark areas.
A vapor barrier is not the same thing as waterproofing. It does not stop liquid water entering through foundation walls, floor cracks, poor exterior grading, or a high water table. If rainwater is reaching the crawl space, plastic placed over the ground may hide the symptom while allowing the real problem to continue.
Signs Your Crawl Space Needs Attention
Homeowners often first notice the effects upstairs. Floors may feel cold or slightly uneven. A persistent musty smell can return after cleaning. Humidity may remain high even when the air conditioning is running, or insulation may sag beneath the first floor.
Inside the crawl space, look for damp soil, droplets on pipes, white mineral staining on masonry, wet insulation, dark staining on wood, visible mold growth, or standing water after rain. Rusting metal supports and deteriorating wooden framing are also reasons to schedule a professional inspection.
Not every odor or humidity issue begins in the crawl space. Bathroom ventilation, roof leaks, plumbing leaks, and basement moisture can cause similar symptoms. A proper evaluation should identify the source before anyone recommends a system.
Choosing the Right Vapor Barrier Material
The material thickness should match the conditions and the purpose of the installation. Thin plastic sheeting may be inexpensive, but it punctures easily and rarely holds up well in a crawl space that needs service access. It is often better than bare soil as a temporary measure, but it is not usually a long-term solution.
For a basic ground cover in a dry, low-traffic crawl space, a reinforced membrane in the 6- to 10-mil range may be appropriate. Heavier 12-, 15-, or 20-mil barriers are more durable, resist tears, and are better suited for crawl spaces that technicians need to enter for plumbing, HVAC, or structural work.
The installation details matter as much as the thickness. Seams should overlap generously and be sealed with compatible tape. The membrane should extend up foundation walls where appropriate and be mechanically fastened or sealed to create a more continuous moisture-control layer. Loose plastic with open seams will not perform like a properly installed system.
White barriers can make a crawl space brighter and easier to inspect. Clear or black plastic may cost less, but it can make leaks, pests, and future repair work harder to see. The best choice depends on the crawl space condition, expected foot traffic, and whether the area is being fully encapsulated.
A Vapor Barrier Is Not Always Enough
This is the most important part of any crawl space vapor barrier guide: moisture control has to address the water pathway, not just the visible dampness.
If exterior runoff is moving toward the foundation, improving grading and managing roof discharge may be necessary. If water enters through the foundation or collects at the lowest point of the crawl space, an interior drainage system and sump pump may be the more reliable solution. If humid outdoor air is entering through vents and condensing on cool surfaces, sealing and conditioning the crawl space may be worth considering.
In some homes, a vapor barrier is the right standalone improvement. In others, it is one part of a larger crawl space encapsulation plan that includes drainage, a sump pump, sealed walls, insulation adjustments, and humidity control. The right scope should be based on what an inspection finds, not a one-size-fits-all package.
Crawl Space Vapor Barrier Installation Basics
A lasting installation begins with preparation. Debris, fallen insulation, sharp rocks, and old plastic should be removed so the new membrane can lie flat without tearing. Any standing water, active leak, or plumbing issue should be addressed first.
The ground is then covered with the selected membrane, with seams overlapped and sealed. Around piers, posts, and other obstructions, the barrier should be carefully cut and sealed rather than simply left open. The goal is to reduce exposed soil and prevent humid air from bypassing the material through gaps.
Wall coverage is more situational. In a basic vapor-barrier installation, the membrane may only cover the floor. In an encapsulated crawl space, the liner typically runs across the floor and up the foundation walls, where it is attached and sealed. Access doors, vents, and penetrations may also need attention to reduce outside moisture entering the space.
DIY installation can work for a clean, dry crawl space with enough room to move safely. But crawl spaces often contain low clearances, poor lighting, exposed wiring, mold, damaged insulation, or standing water. Those conditions can turn a simple project into a safety concern or make it difficult to identify the actual moisture source.
Common Mistakes That Lead to Repeat Problems
The most common mistake is covering wet ground without correcting why it is wet. Water can continue to pool underneath the liner, increase humidity around the perimeter, and create conditions that damage nearby materials.
Another problem is using a barrier that is too thin for the space. A few tears may not seem serious, but they allow exposed soil and moisture to remain part of the crawl space environment. Unsealed seams, unprotected edges, and gaps around support columns have the same effect.
Homeowners should also be careful about sealing crawl space vents without a complete plan. Older homes were often built with vented crawl spaces, but simply closing vents can trap moisture if drainage, ground coverage, and humidity control have not been addressed. Whether vents should remain open, be sealed, or be modified depends on the home’s design and moisture conditions.
Finally, do not overlook mold or structural damage. A new liner improves conditions going forward, but it does not remove existing mold growth or repair weakened framing. Those concerns deserve direct, professional attention.
What to Expect From a Professional Inspection
A useful crawl space inspection should be straightforward. The contractor should look for water entry points, exterior drainage concerns, foundation issues, mold conditions, insulation problems, and the condition of the existing vapor barrier, if there is one. You should receive a clear explanation of what was found and why each recommended repair is relevant.
Ask whether the recommendation addresses liquid water, water vapor, or both. Ask what material will be used, how seams and walls will be sealed, and whether the work includes drainage or a sump pump when standing water is present. Clear answers are a good sign that the scope is built around your home rather than a sales script.
At A-1 Basement Solutions, the focus is No Problems, Just Solutions: explain the condition, recommend the work that makes sense, and complete it with an in-house crew. For major moisture-control work, homeowners should also understand the warranty terms and what ongoing maintenance, such as sump pump checks, may be required.
A clean, dry crawl space is not just a hidden-home upgrade. It is a practical way to protect the air your family breathes, the framing beneath your floors, and the long-term condition of the home you worked hard to own.