
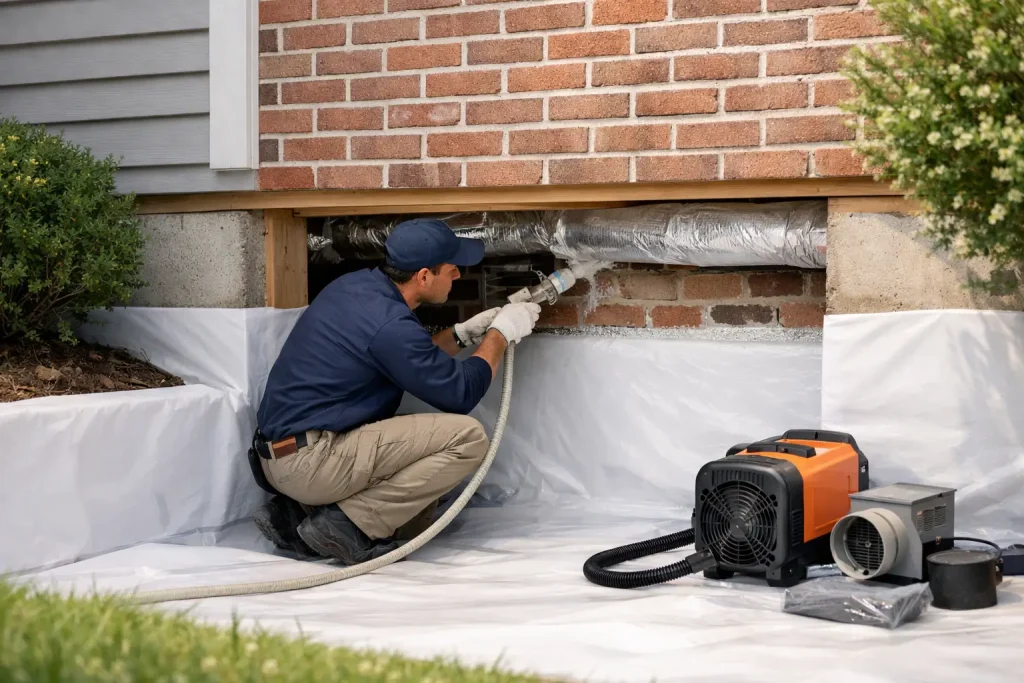
A crawl space can stay out of sight for years while quietly affecting the rest of the house. Musty odors, cold floors, higher humidity, and warped wood often begin below the first floor. This homeowner guide to crawl space sealing explains what sealing should accomplish, when it makes sense, and why the right solution starts with the source of moisture rather than a quick cover-up.
For New Jersey homeowners, the goal is not simply to make a crawl space look cleaner. It is to control ground moisture, outside air, water entry, and drainage so the area supports a drier, healthier, more stable home.
What Crawl Space Sealing Actually Means
Crawl space sealing usually refers to closing off uncontrolled pathways for moisture and outside air. Depending on the home, that may include covering exposed soil with a durable vapor barrier, sealing gaps around pipes and utility penetrations, closing foundation vents, insulating the crawl space walls, and installing a sealed access door.
Many homes need more than those measures alone. If groundwater enters during rain, a proper system may also include interior drainage, a sump pump, or both. If the space has existing mold or damaged insulation, those issues need to be addressed before the area is sealed up.
This is often called crawl space encapsulation, but the terms are not always used consistently. A thin sheet of plastic laid loosely over dirt is not the same as a properly installed moisture-control system. The details matter: wall coverage, sealed seams, support columns, access points, drainage, and the condition of the framing all affect the result.
Signs Your Crawl Space Needs Attention
A crawl space does not need to be visibly flooded to create a problem. Moisture can move upward from bare soil and condense on cool framing, ducts, and pipes. Over time, that steady dampness can encourage mold growth, wood rot, insect activity, and poor indoor air quality.
Pay attention to persistent musty smells, especially after rain or during humid weather. Floors that feel unusually cold or soft, peeling paint near the lower level of the home, condensation on HVAC ducts, and white mineral deposits on foundation walls can also point to moisture below.
If you can safely look inside, check for standing water, wet insulation, dark staining on floor joists, sagging fiberglass batts, rusted metal, or a torn ground cover. Do not disturb suspected mold growth or damaged framing simply to investigate. A professional inspection can identify whether the concern is surface moisture, an active leak, a drainage problem, or a structural issue.
Seal the Water Problem Before Sealing the Space
The most common mistake in crawl space work is treating the vapor barrier as the entire solution. A vapor barrier helps reduce moisture rising from the ground. It cannot stop water that is entering through the foundation, collecting at the footing, or flowing toward the house from outside.
Start by looking at drainage conditions around the exterior. Gutters should be clear, downspouts should carry water well away from the foundation, and the soil should slope away from the home where practical. A short downspout extension may help in one situation, while a low yard or recurring groundwater issue may require a more complete drainage approach.
Inside the crawl space, standing water or seepage calls for a different conversation. An interior French drain and sump pump can collect and remove water before it spreads across the floor. The correct approach depends on where the water is coming from, how often it occurs, the height of the water table, and the layout of the foundation.
There is no benefit to sealing moisture inside. A dry, managed crawl space is the foundation for lasting protection.
A Homeowner Guide to Crawl Space Sealing: The Core Components
A well-planned system is built in layers. First, the area is cleaned and inspected. Wet debris, deteriorated insulation, mold-affected materials, and obvious sources of water intrusion should be evaluated before new materials go in.
Next comes ground moisture control. A heavy-duty vapor barrier is installed across the crawl space floor and, in a full encapsulation system, extended up the foundation walls. Seams are overlapped and sealed, and the barrier is secured around piers and other obstructions. The purpose is to create a continuous boundary between the home and damp soil.
Openings are then addressed. Gaps around plumbing, wiring, sill plates, and access doors can allow humid outdoor air and pests into the space. Sealing these areas helps the system perform as intended. In an encapsulated crawl space, older passive vents are often closed because humid summer air can make conditions worse when it meets cooler surfaces below the home.
That said, closing vents is not a universal do-it-yourself decision. Older homes can have unusual layouts, combustion appliances, or ventilation needs that require careful review. A qualified contractor should assess air movement, appliances, insulation, and code considerations before the space is fully closed.
Finally, humidity must be managed. Some crawl spaces benefit from a dedicated dehumidifier, while others perform well when properly connected to a conditioned air strategy. The right choice depends on the home and should be based on measured moisture conditions, not a one-size-fits-all recommendation.
Insulation Changes Once the Crawl Space Is Sealed
Many homeowners find fiberglass insulation hanging between the floor joists in an older crawl space. When it absorbs moisture, it can sag, lose effectiveness, and hold dampness against the structure. Leaving wet insulation in place after sealing is rarely a good long-term plan.
In a conditioned or encapsulated crawl space, insulation is often installed along the foundation walls instead of between the joists. This helps bring the crawl space closer to the home’s thermal envelope and can make first-floor rooms feel more comfortable. Material selection matters because insulation needs to tolerate the crawl space environment and work with the moisture-control system.
This is one area where a low upfront price can become expensive later. Skipping preparation, using thin unsupported plastic, or insulating before correcting water entry can leave a homeowner with the same moisture problem hidden behind new materials.
What You Can Do Yourself and When to Call a Professional
Homeowners can take meaningful first steps. Keep gutters maintained, extend downspouts, remove stored cardboard or organic debris from the crawl space, and watch for changes after heavy rain. A basic humidity monitor can also reveal whether conditions are consistently too damp.
A small, dry crawl space with no signs of water intrusion may be suitable for limited DIY air sealing or a ground cover upgrade. But professional help is usually the safer choice when there is standing water, mold, recurring odors, deteriorated wood, a low clearance area, electrical concerns, or a sump pump and drainage need.
Crawl spaces are difficult work areas. Poor access, confined conditions, wet wiring, animals, and unstable materials can turn a simple project into a safety issue. More importantly, an inspection can prevent homeowners from paying for sealing work that does not address the real cause.
Questions to Ask Before Approving Crawl Space Work
A clear proposal should explain the problem being solved, not just list products. Ask where the moisture is coming from and how the contractor verified it. Ask whether drainage is needed before encapsulation, what will happen to existing insulation and mold-affected materials, and how humidity will be controlled after the work is complete.
It is also reasonable to ask who will perform the installation, what is included in cleanup, and what warranty applies to the work. A-1 Basement Solutions uses in-house crews and approaches crawl space protection as part of the home’s broader waterproofing and foundation needs. That matters because a crawl space system should work with the property’s drainage, structural conditions, and long-term maintenance plan.
Be cautious with fear-based recommendations or promises that any single product will solve every issue. Good contractors explain the trade-offs, show you the conditions they found, and give you a practical path forward.
Keep the Space Dry After the Work Is Done
Sealing is not a set-it-and-forget-it excuse to ignore water around the home. Check the crawl space periodically, especially after major storms. Confirm that the sump pump is operating if one is installed, keep discharge lines clear, and monitor humidity during the warmest months.
You should also keep the access door closed and avoid puncturing the vapor barrier when placing storage or completing utility work. If an odor returns, the dehumidifier runs constantly, or water appears after rain, address it early. Small drainage corrections are easier when they are not allowed to become widespread damage.
A properly sealed crawl space should give you more than a cleaner area below the house. It should give you clearer control over moisture and confidence that the home is being protected from the ground up. When conditions are uncertain, a straightforward inspection is the right next step: no pressure, just the facts and a solution that fits the home.